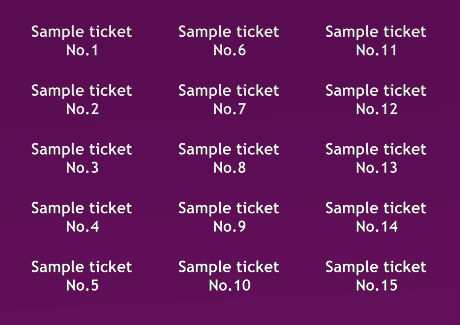
Now it’s possible. Now it’s easy and fun. In this simple tutorial you will learn how to use improved bullets and numbering InDesign’s feature to get numbers on your tickets. Our goal will be to create 1000 tickets, numbered from number 1 to 1000. Of course, you are not limited to this number. You can create as many as your like.
We will start with ticket dimensions: 80x30mm. This is important because we are going to impose these tickets on A4 paper. After some calculation I found 15 tickets per page works OK for me – 3 columns and 5 rows. To make room for 1000 tickets we need 67 A4 pages (1000/15 = ~67).
Create new A4 InDesign CS3 document with 67 non facing pages in landscape orientation.
Open pages palette and double click on A master. Make text frame with dimensions matching dimensions of ticket and place it in upper left corner on master page.
Go – Type – Show hidden characters (make it active).
Type some text in newly created text frame and after the first line press Enter 2 times to get 2 paragraph symbols as on image below.
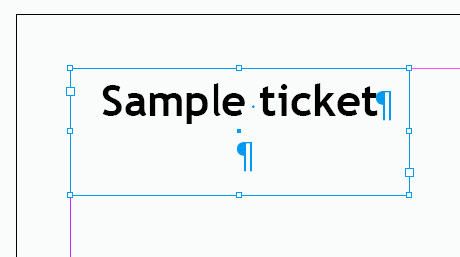
Select second paragraph symbol and lower font size for a couple of points. Open Paragraph styles palette and Option/Alt click on new style icon located at the bottom of palette to create new style. Name your new style to something like “to change”. Leave all settings and click OK. Click on the “to change” style in paragraph palette while you still have selected paragraph symbol.
Now make duplicates of text frame to fill A master page. You will end up with 15 tickets.
If you open page 1 you will find that text frames are not editable. To make all text frames editable select page 1 in pages palette and hold shift key when you click on last page in document (page 67). Open flyout menu and choose “Override All Master Page Items”.
Now go to page 1 and select second paragraph symbol of the first text frame located in upper left corner.
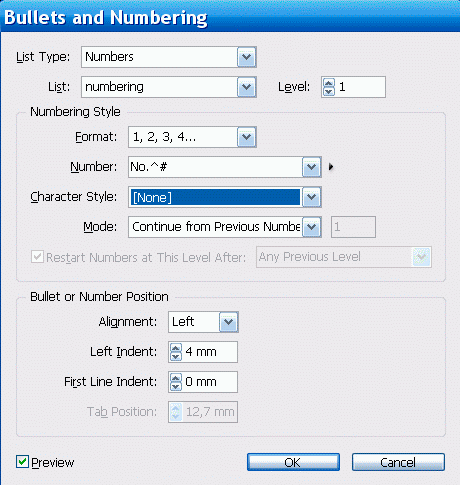
Option/Alt click on bullets and numbering button located in control panel. In the B&N window make following settings:
List type: numbers
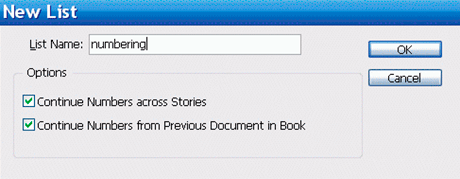
List: choose New… name it, and leave both items checked. This is very important step. Each text frame is one story. “Continue across stories” option will allow continuous numbering across all text frames in document.
Format: 1,2,3,4
Number field: default is ^#.^t You can play a lot with this field.
^# – represent auto number
^t – represent tab
No.^# (customized)
Mode: continue from previous number
Open Paragraph styles palette and Alt click on new style icon at the bottom of palette. Name style to something like “numbering”. Click on the new created style name in paragraph palette just to be sure that you applied style to selection.
Deselect everything.
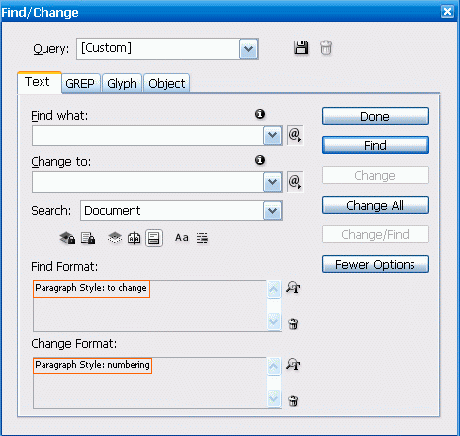
All we have to do now is to call Find/Change to help us with numbering process – Edit – Find/Change and make settings like on image below. Click on Change all button and watch the magic.
Delete unwanted tickets from last page if you want exactly 1000 tickets.
To create crop marks select all text frames on master page and apply CropMarks script with “each object selected”.
That’s it Indy lovers.
