
How to get rid of this unsightly effect…There are many technical reasons and some disagreement as to why purple fringing occurs in digital cameras. These factors include the lens, focus, leakage between pixels, and more…
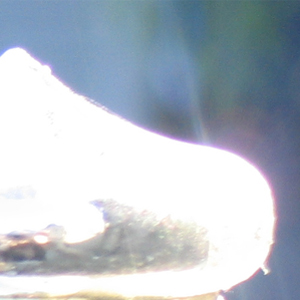
What to do! You have taken a lovely photo, only to take it home and discover this purplish haze around the edges of the subject??
The most common cause of purple fringing is low light with high-contrast boundary areas in an image. So in the case of my example above, I took a photo of a reflective surface on a sunny day with the sun shining behind it.
Oh woe is me! Well.. never fear.. there is a way to fix this photo using Photoshop, I am going to show you the way that was easiest for me, of course there are a number of ways to do this… but I found this method to be the easiest to remember and most effective!
Step 1: Open up the image in Photoshop
Step 2: Using the toolbar, select image>adjustments>hue/saturation. A small hue/saturation box should appear on the screen.
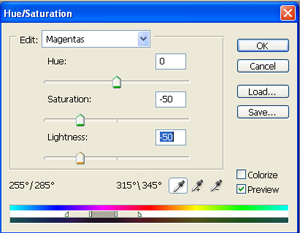
Step 3: In the drop down menu that says Master, select Magentas. Now move the saturation slider down to -50, and move the lightness slider down to -50.
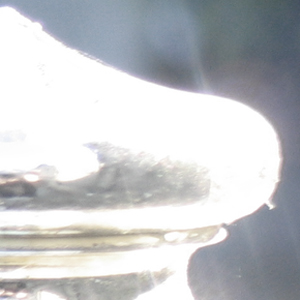
Step 4:If needed repeat steps 2 and 3
Now the Purple Fringing is gone.. Hoorah!!
Thanks to Hilary Quinn from Freestockmagic for allowing me to reproduce her tutorial.
Comments are closed.