
One of the most common things beginners to Photoshop wants to be able todo is seperate one object or so from it’s background. There are as many ways to extract an object from it’s background as there are languages on our earth and every one is different from eachother. One way is using the filter in Photoshop called Extract.
I won’t say it’s the best method nor I’ll say it’s the worst method to seperate objects from it’s background. I think it depends on the demands you’ve got and what kind of experience with the tool and photoshop experience.
One of the things that’s easiest in Photoshop and probably everyone can do is paint with help of the brush tool and erase it with help of the erase tool. The Extract tool works kind of the same way, you paint the edges you want to retain and then fill it and volá you’ve free’d the object from it’s background. One thing that I’ve discovered through out the years as working in Photoshop and extract objects from it background is that they always requires some sort of cleaning up afterwards, this tool is no exeption, it depends on how fine you have retained the edges in the tool but you’ll probably need to smooth the edges later on when your’e done in the tool.. But that’s an easy task todo.
Sounds difficult? Well I’ll explain the process for you below.
1. Open Adobe Photoshop and in the menus go to Filter » Extract (alt-cmd-x)
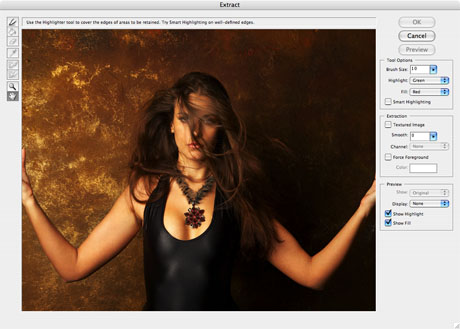
2. The extract tool window is now open and you’ll see a toolbox bar to the left, the image and several options to your right.
3. I’ll first go through a number of tips concering the options to the right in the tool. The brush size is is important to change as it’s the tool you will be working with retaining the edges of the object. The highlight color and the fill color are the color you paint and fill with around and in the object. You decide yourself, but think that certain colors looks various good on various images for an example dark pictures a green or blue highlight color is better then red, anyway it’s a decision you’ll need to make yourself.
You’ll now see a smart highlightning checkbox and when you active this it’s easier to draw around edges that are light and it follows easily. Perfect use when trying to retain edges at arms, hands, neck and various things. Without this you kind of paint freely and doesn’t follow anything, this is good when it comes to hair and tricky objects to retain.
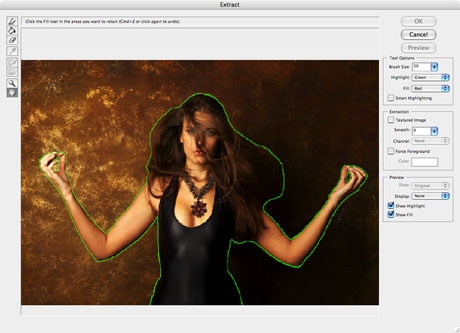
4. In order to get good result of using the tool and retain really good edges, you’ve need to be steady on your hand and be aware of this in your mind.. The brush should follow the edges, not go over them.. Let’s say for an example you paint the hand with a thick brush and really go over the edges. The hand would have lost much of it because of the act going over it.. Just follow the edges, don’t paint over them.. Then use the erase tool if so happens.
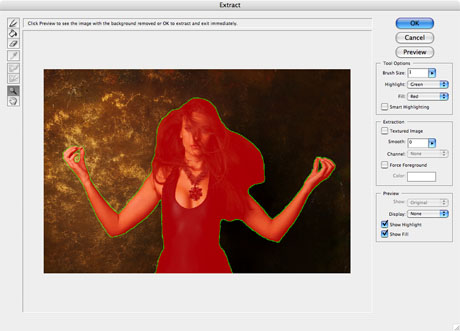
5. Now paint the edges and remember it must be a sealed as well.. Take a close look and see if you haven’t overpainted on certain parts and then take the fill tool and fill inside the edges and then you can preview your extraction, if not , just go back and try again.
6. Go back to Photoshop and smooth the edges and fix the beauty problems with your extraction..
I’ll say it again.. This is not the perfect tool but it’s not the worst either, it’s much up to you how you use it!
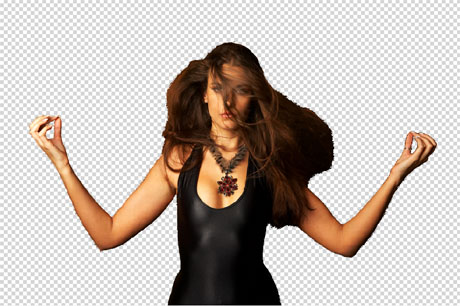
Here’s a image I later created from the extraction, just some drop shadow, fixing beauty problems and adding a background..

Comments are closed.